Importing subscribers in Arigato PRO is easy but entering field numbers can be a bit confusing. Especially if you have custom fields in the mailing list and the CSV file. This guide will clear it all up.
Note! If your file contains any non-English characters (for example Asian, Cyrillic, any French and Spanish accents etc.), you must encode it in Unicode / UTF-8 format! See how to do it.
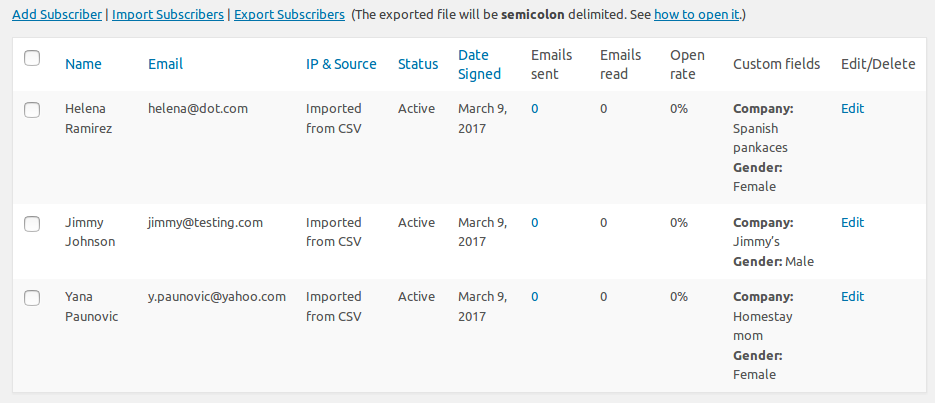
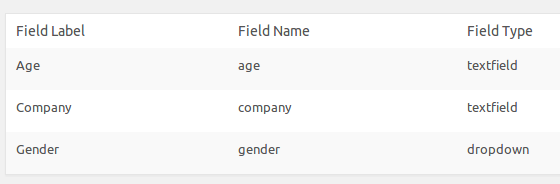
Let’s make an example with a mailing list with 3 custom fields:
And a CSV file which doesn’t perfectly match the mailing list:

And when you click on “Import subscribers” in Arigato PRO, this is what you see:
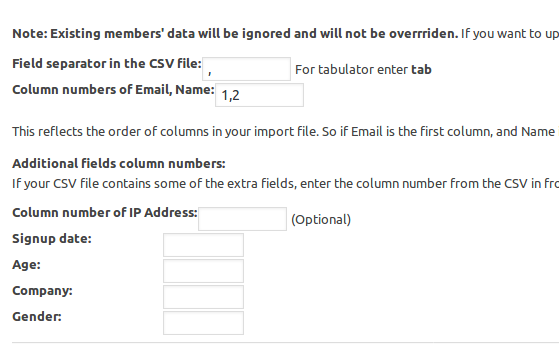
So there are a few problems to deal with here:
- The CSV file does not contain “Name” column. It contains first name and last name columns and you want the name in your mailing list to contain first and last name.
- The CSV file has the columns ordered in a way that obviously isn’t the same as the order on the import page.
- The CSV file contains some columns you don’t need (Client ID, State, ZIp, Phone, Address) and lacks the Age data.
So how to import this? Let’s visually number the columns in the CSV file:

Now things become simpler and we just have to watch at the import page first, find the field we need in the CSV and enter its number. Because “name” is constructed by 2 column, we enter them both with “+”. Here you go:
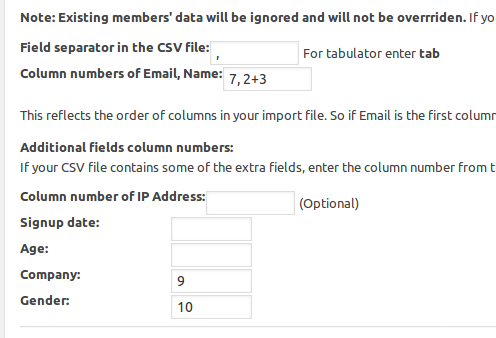
Let’s explain:
- Email is column number 7 in the file so we enter it before the comma in the “Email, Name” field.
- Name is constructed by columns 2 and 3 so we enter them as “2+3” after the comma. So the “Email, Name” field becomes “7, 2+3. Spaces do not matter.
- The CSV file does not contain fields for IP address, signup date and age. So we leave these blank.
- Company is column number 9.
- Gender is column number 10.
That’s it, import with “Skip first line (column titles) when importing” selected. And we are done: