Monthly Archives: February 2016

Using All “Final Page” Variables in WatuPRO Certificates

If you use the certificates feature in WatuPRO you have probably noticed that not all variables available in the “Final Page / Quiz Output” box are available in the certificate.

Why? The answer is very simple: many variables are calculated on the fly when user submits the quiz. They cannot be calculated at a later stage without having all the detailed POST-data that we have while submitting the quiz.

Certainly we could store all this variable content in the database and pull them in the certificate but this means that with or without certificates you will have a lot of unnecessary data taking space in your database. You don’t want this.

There is very simple trick to handle this:

Include any “final page” variables in the grade description of the grade that assigns the certificate. If you don’t use grading just create one “catch all” grade from 0% to 100% correct answer so it catches every submitted quiz.

Once done, use the variable %%GRADE%% or %%GDESC%% in your certificate (which is the grade title + grade description). All the variables will be processed at the time of calculating the grade description and then this unique description will be shown in the certificate. Voila, you can have all variables arranged in any way you wish in the certificate. And without wasting any database space.

This trick will however not work if you are manually editing user’s results of the already submitted quiz through the administration.

Note: from WatuPRO version 5.8.4.5 you can use the bolded variables from “Manually craft the output” section here directly in the certificates.


Lead Magnets in Arigato PRO Intelligence Module 1.1

From Intelligence module version 1.1 and Arigato PRO version 2.6.0.6 you can create lead magnets  and add them to the signup forms.

What’s a Lead Magnet and How Is It Different Than a Welcome Email?

Just like a Welcome email (the “0 days” email you set in an autoresponder campaign), the Lead Magnet is just an email message which is sent immediately when an user subscribes to a mailing list.

The main difference between a lead magnet and a welcome email is that the magnet email will be sent to the user even if they are already registered in the mailing list. This means you can have multiple sigup forms at different times on your site for different lead magnets. If an user who is already subscribed fills the form they will still receive the lead magnet email without disturbing any existing drip marketing campaigns for them.

At the same time if new user signs up, they’ll be subscribed to the associated mailing list(s) and receive any autoresponder emails plus the lead magnet email.

So, the lead magnet can be attached to any signup form regardless of the mailing list(s) the form goes to.

Note that you can have only one lead magnet per signup form.

How To Use The Lead Magnet Codes

In order to attach a lead magnet to Arigato PRO signup form you need to include its field code in the form. There are three codes and each one should be used only with the appropriate signup form code:

A) The simple shortcode attribute:

lead-magnet-codes1

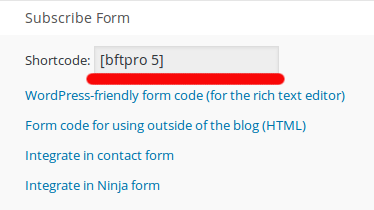
This attribute should be used with the simple form shortcode which is available for every mailing list:

form-shortcode

So instead of the default [bftpro 5] you’ll make a shortcode like this: [bftpro 5 magnet_id=14]

B) The field shortcode:

lead-magnet-codes2

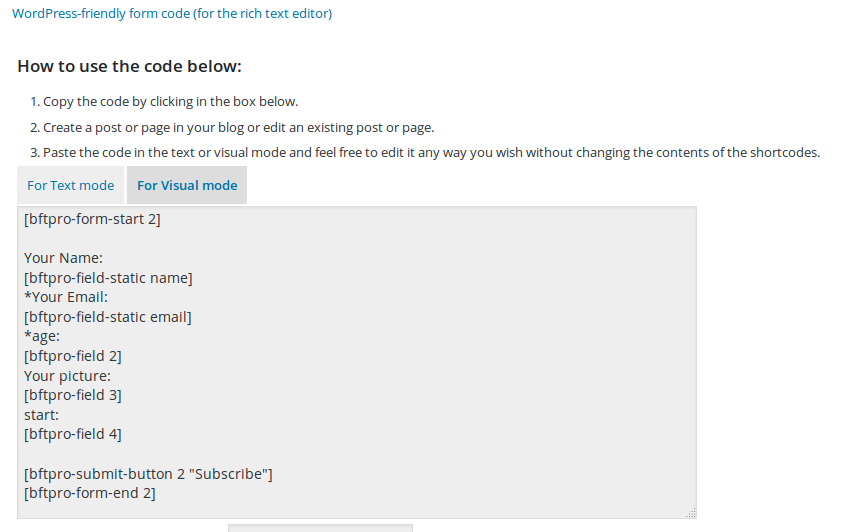
The field shortcode should be used with the “WordPress-friendly shortcodes” for the mailing list:

wp-friendly-shortcodes

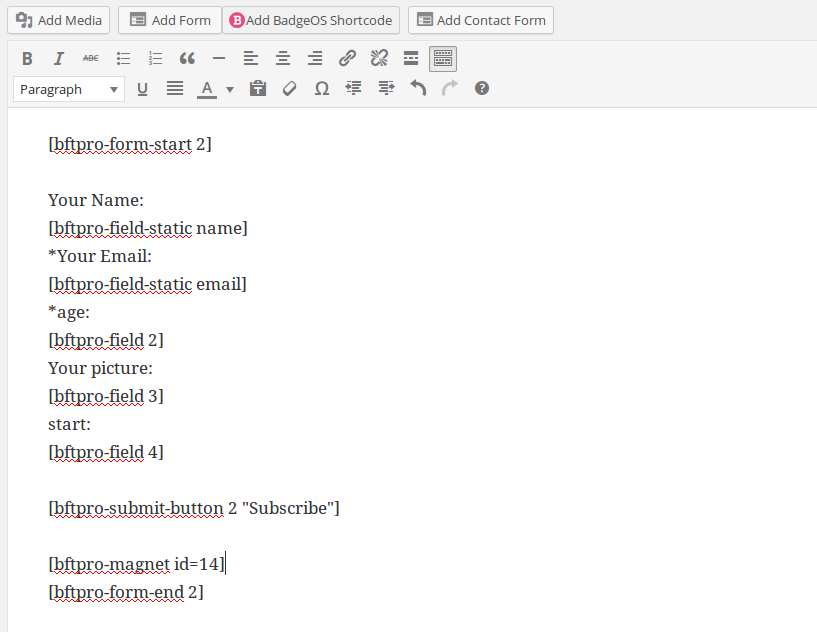
Place the magnet shortcode before the form end so it becomes something like this:

form-with-code


C) The field HTML code:

lead-magnet-codes3

This code should be used only if you are using the “Form code for using outside of the blog (HTML)” for a given mailing list. The field should be placed before the closing </form> tag.