Category Archives: CalendarScripts

Lead Magnets in Arigato PRO Intelligence Module 1.1

From Intelligence module version 1.1 and Arigato PRO version 2.6.0.6 you can create lead magnets  and add them to the signup forms.

What’s a Lead Magnet and How Is It Different Than a Welcome Email?

Just like a Welcome email (the “0 days” email you set in an autoresponder campaign), the Lead Magnet is just an email message which is sent immediately when an user subscribes to a mailing list.

The main difference between a lead magnet and a welcome email is that the magnet email will be sent to the user even if they are already registered in the mailing list. This means you can have multiple sigup forms at different times on your site for different lead magnets. If an user who is already subscribed fills the form they will still receive the lead magnet email without disturbing any existing drip marketing campaigns for them.

At the same time if new user signs up, they’ll be subscribed to the associated mailing list(s) and receive any autoresponder emails plus the lead magnet email.

So, the lead magnet can be attached to any signup form regardless of the mailing list(s) the form goes to.

Note that you can have only one lead magnet per signup form.

How To Use The Lead Magnet Codes

In order to attach a lead magnet to Arigato PRO signup form you need to include its field code in the form. There are three codes and each one should be used only with the appropriate signup form code:

A) The simple shortcode attribute:

lead-magnet-codes1

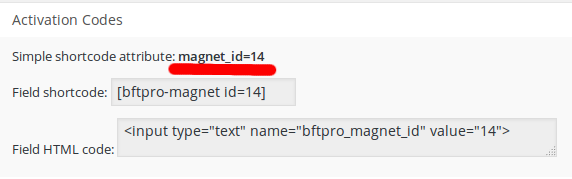
This attribute should be used with the simple form shortcode which is available for every mailing list:

form-shortcode

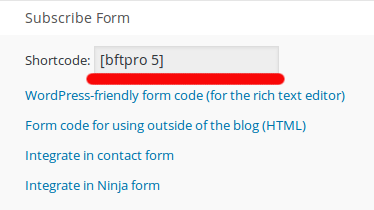
So instead of the default [bftpro 5] you’ll make a shortcode like this: [bftpro 5 magnet_id=14]

B) The field shortcode:

lead-magnet-codes2

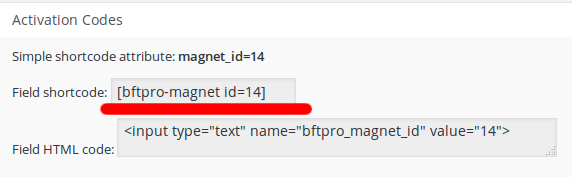
The field shortcode should be used with the “WordPress-friendly shortcodes” for the mailing list:

wp-friendly-shortcodes

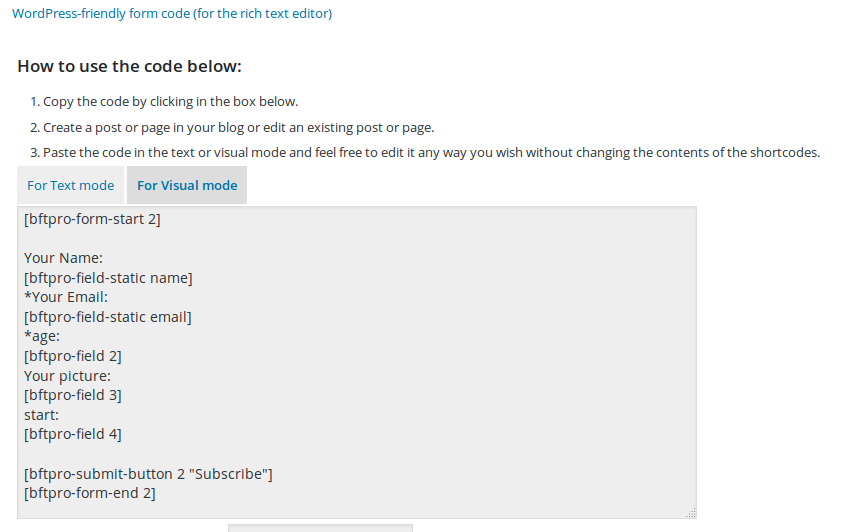
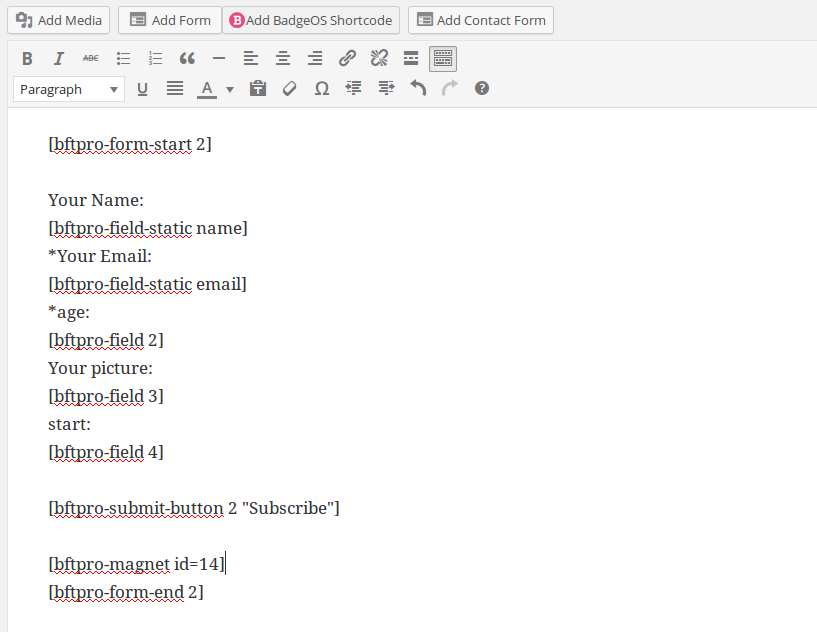
Place the magnet shortcode before the form end so it becomes something like this:

form-with-code


C) The field HTML code:

lead-magnet-codes3

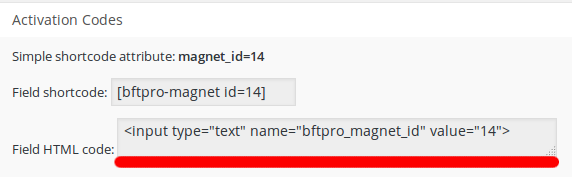
This code should be used only if you are using the “Form code for using outside of the blog (HTML)” for a given mailing list. The field should be placed before the closing </form> tag.

Responsive Email Presets from Arigato PRO 2.6

The new version of Arigato PRO – 2.6 – comes with a very important and powerful feature: responsive email presets.
While the idea is similar to the email templates in the Intelligence module, the presets will be more convenient for most users.
Instead of defining just the header and footer where your message is, they define the whole responsive design and let you visually edit the blocks of contents.

The current version comes with three presets – Basic, Right Sidebar and Two columns:

presets

When creating a new message you can choose to use the default rich text editor or use a preset. On the next page you’ll be presented with visual editor for editing every block of content. Once selected a preset it can’t be changed for that newsletter or message.

Working with them is slightly constrained because you can edit the content of the blocks only. You can’t more or remove whole blocks. But this guarantees good design in different devices and screen resolutions.

If the existing designs are not sufficient you can create your own and import them in the database. We have used Foundation for Emails and strongly recommend it for creating your own designs.

Full Changelog from Version 2.5 to Version 2.6

  • Responsive presets: now when creating a new newsletter or autoresponder message you can choose to use the design of one of our responsive templates and then visually edit the content in the different blocks.
  • The “num sent” and “num read” numbers on the newsletter reports page now open detailed list of the received emails and date when the email was sent to them
  • Added option to resend confirmation email.
  • Added option to BCC all outgoing emails to a selected email address.
  • The option “auto subscribe everyone who registers on my blog” now allows configuration to happen immediately on registration – in case you don’t want to wait users to log in.
  • New option lets you automatically delete unconfirmed subscribers older than X days.
  • You can have your own clickable text for unsubscribe link instead of displaying the long unsubscribe URL.
  • You can also specify URL where the user to be redirected after unsubscribing.
  • [Intelligence module] Split testing enabled for autoresponder email messages.
  • [Intelligence module] Paid signup for mailing lists is now available (payment handling through Paypal).
  • Added option to load reCaptcha’s javascript library through SSL.
  • Added checkbox to test the Bounce tracking connection.
  • Fixed bug: lists that were integrated in contact form and had “auto subscribe to blog” option checked did not subscribe the user to the blog.

Eligible customers will receive their update by newsletter.

WatuPRO Basic Bar Chart

From version 5.0.5 the quiz plugin WatuPRO comes with a basic bar chart shortcode that can be used to display a chart in the final page of the quiz.

The chart can be used for two main purposes:

a) to show how your result compares to the averages of other quiz takers on the same quiz.
b) to show your points vs. maximum possible points chart.
c) to show how your current attempt compares to your previous attempts (for logged in users)

Here are examples of the chart:

Yours vs Average Results:

watupro-barchart

Your own results overview:

(this mode requires at least WatuPRO 5.1.5.5)

chart-overview

This basic chart does not require the Reporting Module. Below is a more detailed explanation how to use the shortcode:

Please note this shortcode can be used only in the quiz output box. At the moment it won’t work anywhere else including certificates.

Using the shortcode

The shortcode to be included in the final screen is [watupro-basic-chart]

It can be used without any attributes in which case will produce a chart like in the image above. You can however use several attributes to customize it:

show  – this attribute defines whether to show both charts, only the points chart, or only the percentages chart. The possible values of this parameter are: ‘both’, ‘points’, ‘percent’, or ‘max_points’. When the value is max_points the chart will display your points vs. maximum possible points bars.

your_color – the color of the bar with user’s stats (your points, your % correct answer). Defaults to blue. Can accept color as a word or as hexadecimal value.

avg_color – the color of the bar with average or maximum stats (avg. points, avg % correct answer). Defaults to gray. Can accept color as a word or as hexadecimal value.

bar_width – the width of the bar in pixels. Defaults to 100.

average – “show” or “hide” depending on whether you want to show the bar with the average values from everyone (or maximum points, depending on “show”). If you omit the argument, it will be shown. If the parameter show is set to max_points, the maximum will always be shown.

The following attributes are not documented in the Help page because using them improperly can cause on-screen errors:

overview – defines how many attempts to show in total and will work only for logged in users. Defaults to 1, i.e. by default it shows only the latest attempt. The max. is 10.
If the parameter show is set to max_points, then overview is always switched off to 1.

your_points_text – defines the text written under “Your points” bar. Defaults to “Your points: %s”. You can change it but it must always include the “%s” variable.

your_overview_points_text – When overview is more than 1, this is the text that will show for the previous attempts. Defaults to “%s: %s”. You can change it but it must always include the “%s” variables because they will be replaced with date and points.

avg_points_text – defines the text written under “Avg. points” or “Max. points” bar. Defaults to “Avg. points: %s”. You can change it but it must always include the “%s” variable.

your_percent_text – defines the text under “Your % correct” bar. Defaults to “You: %d%% correct”. Must always include the “%d” variable.

your_overview_percent_text –When overview is more than 1, this is the text that will show for the previous attempts. Defaults to “%s: %d%% correct”. Must always include the “%s” and  “%d” variable.

avg_percent_text – defines the text under “Avg. % correct” bar. Defaults to “Avg. %d%% correct”. Must always include the “%d” variable.

round_points – set to 1 if you want to not use decimals and have all points rounded.

Here is an example usage including several arguments:

[watupro-basic-chart show="points" your_color="red" avg_color="#00FF00" your_points_text="You: %s points" avg_points_text="Avg.from all users: %s points"]