A personality quiz is a quiz where the results do not depend on from-to points collected (or % correct answers) but the answers are directly matched to the result. So with a classical example of Intorvert / Extrovert type of quiz answer A of question 1 could be giving 1 point to Introvert category and answer B might be giving 2 points for Extrovert category. Answer A on quesiton 2 could be giving 3 points for Extrovert etc. At the end of the quiz the result that collected the most point is the respondent’s personality.
Here is a really basic example.
And here is how you can create such a quiz:
1. You need the Intelligence module installed. When creating your quiz you need to check the following checkbox in the “Intelligence Module Settings” area:

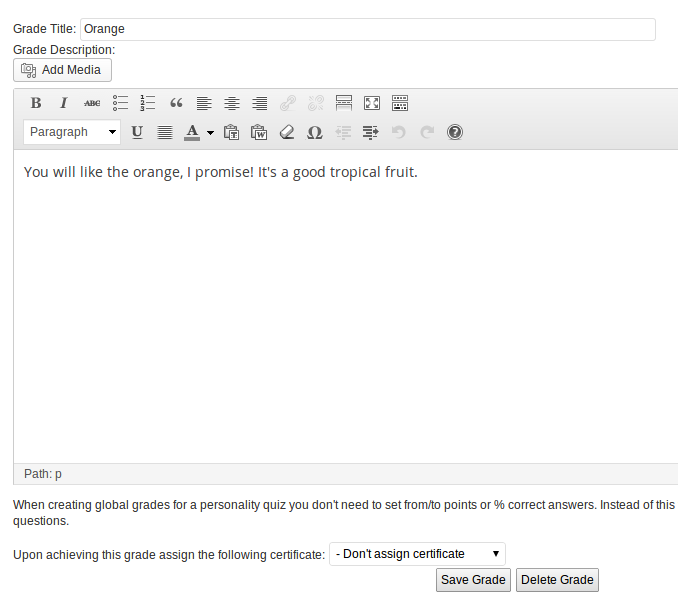
2. It’s recommended to then go and create your Personality types:
Unlike Grades, the personality types do not have “from points” – “to points” setting. This is because they are directly matched to question answers (see below).
If you wish you can assign certificates just like in the knowledge quizzes.
3. Create your questions
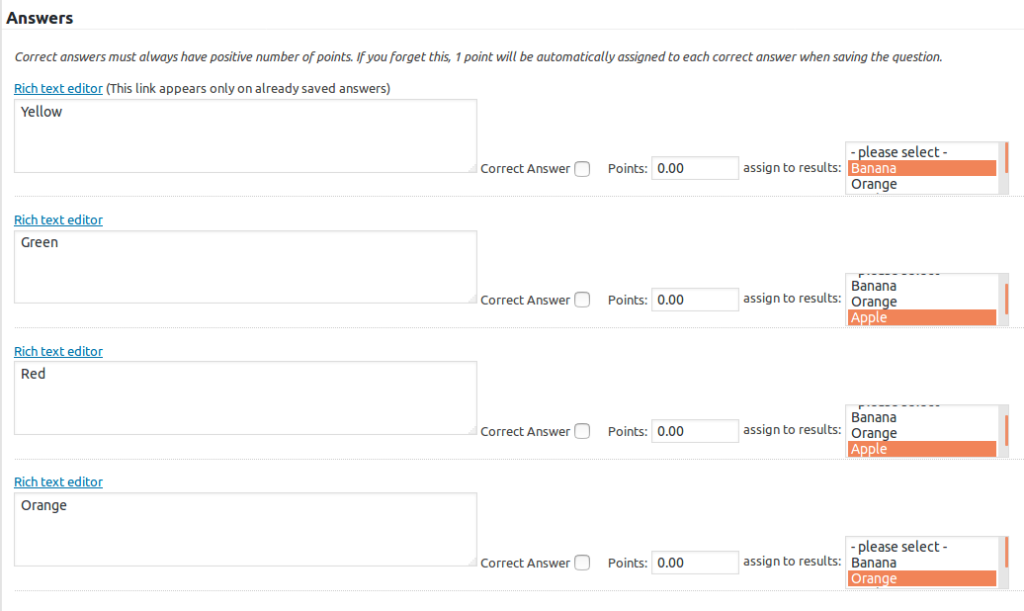
When creating them, directly match the possible answers to the possible results:

If you wish you can use “Correct answer” and “points” fields but they usually don’t make sense in personality quizzes. Only the “Assign to grade” selection will be taken into account when calculating the result of the quiz.
From WatuPRO version 5.0.3.2 and above points actually matter. Quizzes work as they used to when you enter 0 or 1 point. We will count one point for the associated personality type(s) in both these cases (because adding zero when you have selected that personality type makes no sense). But this and future versions allow you to enter more points and they will be calculated to the associated personality type(s). So you can give some question or answer more weight by assigning 2 or more points to it.
Sortable questions are special case. Learn more about them here.
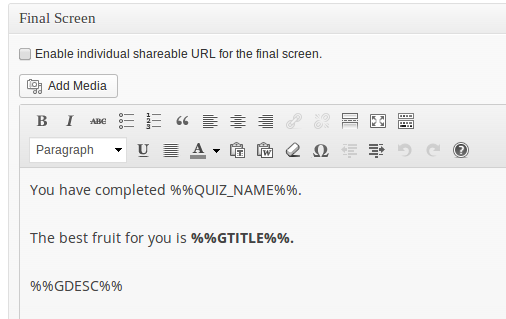
4. Setup your Final screen:
This is not too different than the final screen on knowledge quizzes and exams. Except that most probably you won’t use tags for number of points and correct answers (although you can include this information if you wish).
That’s it.
Elaborating Quiz Results
You can also elaborate this by including information how the different personality types rank for the given quiz taker. The information below is also available in the internal Help page of the plugin:
The following shortcode can be used only in the “Final Screen” and email box to improve the content shown to the user on personality quizzes. Many personality quizzes work better when displaying not just the assigned personality type but also information how many answers the user gave for the other types. Here is how to use it with an example:
[watupro-expand-personality-result sort="best" limit=3 empty="false"]

For personality type {{{personality-type}}} you gave {{{num-answers}}} answers ({{{percent-answers}}}% of all).

<p>{{{personality-type-description}}}</p>

[/watupro-expand-personality-result]
Inside this shortcode you can use ONLY the 3 curly-braced variables shown above, exactly the way you see them. Don’t use %%GRADE%%, %%GDESC%%, or %%GTITLE%% or other of the global variables inside the shortcode.
The text inside the shortcode will be repeated for every personality type. All the arguments in the shortcodes are optional:
- sort defines how the types are sorted. You can sort by “best” (most answers collected type on top), “worst” (least on top), “alpha” (alphabetically by type title). If you don’t specify the parameter the types will be sorted by the order you created them.
- limit can be used to limit the number of personality types shown after sorting. Will be useful if you have tens of personality types and want to show only the ones that user gave most answers for. Or set to “1” to display information only for the type they received as result. If you don’t include this parameter all the existing types will be shown.
- empty defines whether the personality types that got 0 answers will be shown. When the parametter is skipped, they will be shown. When set to “false” they will be excluded.
Multiple Personality Types
From WatuPRO 5.3 in case several personality types rank first with the same number of “points” they will all be displayed to the quiz taker.
If you have assigned certificates they won’t be issued in these cases (this may change in a future version).
Note the option “Assign only one personality” in the Intelligence module tab (just under the “This is a personality quiz” checkbox). If you select it, you will have the quiz work the “old” way – in case of a tie only one personality type will be assigned instead of multiple personalities.
Personality Chart
From version 6.1.4 you can use the shortcode watupro-personality-chart to print a bar chart from the performance on each personality type. This shortcode can be used on the “Quiz output / Final page” box (or in the email contents sent right after completing the quiz).
Supported shortcode parameters:
- bar_width is the width of each bar in pixels. Defaults to 200.
- label is the text shown under each bar. It supports the variables {{personality-type}} and {{points}}
- colors is comma separated string of desired colors of the bars. You can skip the parameter, then default set of colors will be used.
Here is an example chart and the shortcode used to display it:

[watupro-personality-chart bar_width=250 label="{{personality-type}}" colors="#AA0070, #B91ACC, #C0FA9F"]
The chart will display up to 10 bars.
To pass associative colors (so you can attach a color to a personality) use the attribute assoc_colors instead of colors. Each color will consist of the numeric personality ID (visible in your Manage Personality Types page), a colon, and the color. Example:
[watupro-personality-chart bar_width=250 label="{{personality-type}}" assoc_colors="1:#AA0070, 3:#B91ACC, 4:#C0FA9F"]
This way each personality bar will have the specified color for that personality regardless how they rank.
Myers – Briggs Personality Tests
These are very specific and usually are not created using this feature. Learn how to create Myers-Briggs tests here.


